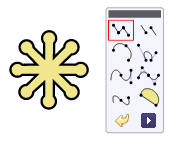
Each drawing task is characterized by:
Its icon
The drawn type element
The number of entered points (1,2,3,..)
Two successive points can be entered in two ways (excepted free path):
Click the first point keeping the mouse button pressed, move the mouse to the next point and release the button (sequence is mouse down, mouse move and mouse up).
Click the first point by releasing the mouse button and click on the next point (sequence is two mouse clicks).
Drawing tasks with many points have a floating menu with the two actions remove last point and next to finish the drawing element.
Table 5.3. Drawing tasks
| Drawing task | Element | Points | Description | |
|---|---|---|---|---|
|
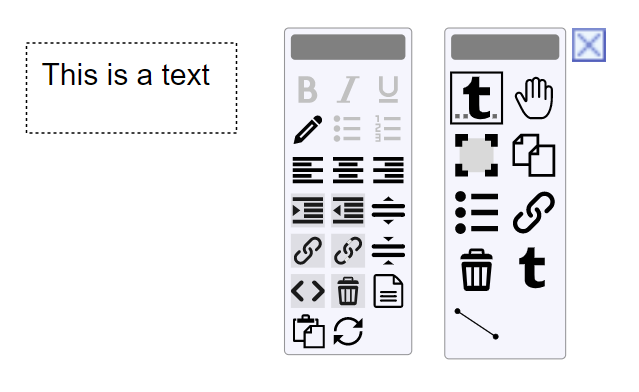
| Text | 1 |
Click the text position and type its content. 
See draw simple text , multiline text showcases for an interactive demonstration of how to draw and edit a text. | |
|
| Path | many |
Drawing a path with basic commands 
The floating drawing task menu is showing the path commands. Select command and enter points then click next to finish the path. See draw path with curves , path with hole showcases for an interactive demonstration of how to draw path. | |
|
| Path | many |
The shape can be drawn in two ways:
The path can then be simplified by filtering the points using the filter points editor See draw free path showcase for an interactive demonstration. | |
|
| Image | 2 |
Draw the image position by its top left and bottom right corners. The svg image element can represent a picture by referencing its HTTP-URL or locally by storing it's base64 encoded data. The default element draws the image of the Mona Lisa by HTTP reference.To change the default content :
See draw image showcase for an interactive demonstration of how to draw an image. | |
|
| Image | 2 |
Draw the map position by its top left and bottom right corners. The element is an image with a Google Map image link. The default map location is centered on Paris. To change it use the map editor .The map element offers also the editors of an image element. See draw map showcase for an interactive demonstration of how to insert and edit a Google Map in your SVG drawing. | |
|
| Svg | 2 |
Draw the svg position by its top left and bottom right corners. The default content can be replaced by another document loaded from a file or an url . See include svg showcase for an interactive demonstration of how to insert a svg document. | |
|
| Line | 2 |
Draw the line by its start and end points. See draw line showcase for an interactive demonstration of how to draw a line. | |
|
| Vertical line | 2 |
Draw the line by its start and end points. See showcase draw horizontal and vertical lines . | |
|
| Horizontal line | 2 |
Draw the line by its start and end points. See showcase draw horizontal and vertical lines . | |
|
| Polyline | many |
Enter each point of the polyline then click next in the floating menu to finish the polyline. | |
|
| Triangle | 3 |
Draw the triangle by its three points. See showcase drawing a triangle . | |
|
| Polygon | many |
Enter each point of the polygon then click next in the floating menu to finish the polygon. | |
|
| Rectangle | 2 |
Draw the rectangle by its top left and bottom right corners. See draw rectangle showcase for an interactive demonstration of how to draw a rectangle. | |
|
| Circle | 2 |
Draw the circle by its center and radius points. | |
|
| Ellipse | 2 |
Draw the ellipse by its center and size points. | |
|
| Path | 3 |
Draw the circle arc by its first point, end point and middle point. The middle point defines the radius. | |
|
| Path | 4 |
Draw the cubic arc by its first point, end point and the two tangents points. | |
|
| Path | 3 |
Draw the quadratic arc by its first point, end point and the tangent point. | |
|
| Path | many |
Enter each vertex of the curve and then click Next in the floating menu. The tasks create tangents default then be adjusted with the edit function. | |
|
| Path | many |
Drawing a cubic area Enter each vertex of the area and then click Next in the floating menu. The tasks create tangents default then be adjusted with the edit function. | |
|
| Path | many |
Drawing a quadratic curve Enter each vertex of the curve and then click Next in the floating menu. The tasks create tangents default then be adjusted with the edit function. | |
|
| Path | many |
Drawing a quadratic area Enter each vertex of the area and then click Next in the floating menu. The tasks create tangents default then be adjusted with the edit function. | |
|
| Path | many |
Drawing a cubic smooth curve Enter each vertex of the curve and then click Next in the floating menu. The tasks create tangents default then be adjusted with the edit function. | |
|
| Path | many |
Drawing a cubic smooth area Enter each vertex of the area and then click Next in the floating menu. The tasks create tangents default then be adjusted with the edit function. | |
|
| Path | many |
Drawing a quadratic smooth curve Enter each vertex of the curve and then click Next in the floating menu. The tasks create tangents default then be adjusted with the edit function. | |
|
| Path | many |
Drawing a quadratic smooth area Enter each vertex of the area and then click Next in the floating menu. The tasks create tangents default then be adjusted with the edit function. |